Python CRUD REST API with Cloudant
Setup
-
Sign up with Bluemix so that we can easily setup Python hosting and a Cloudant database.
-
Download the Cloud Foundry command line interface. This can be run in OSX Terminal or Win Command Prompt (Cygwin not supported)
$ cf api https://api.ng.bluemix.net$ cf login -
Install Python version 2.7.x. You can check if you already have Python installed with:
$ python --version -
Get the starter code for a Python Flask server. This starter code will have everything we need to run our server in Bluemix. The [app_name] has to be unique. Your name followed by 4 random numbers should do (e.g. patrick_5342)
$ git clone https://github.com/pwcremin/pythonstarter [app_name]$ cd [app_name] -
Now all we have to do is push our app and we will have a hosted Python server! This step will take a few minutes.
$ cf push [app_name]Once the server has successfully started, navigate to [app_name].mybluemix.net
-
Create and bind your Cloudant service
$ cf marketplace -s cloudantNoSQLDBYou can see from the output that Bluemix will give you plenty without there being any cost, so lets get this service going:
$ cf create-service cloudantNoSQLDB Shared [app_name]-cloudantNoSQLDB -
Bind the service to your app
$ cf bind-service [app-name] [app_name]-cloudantNoSQLDB$ cf restage [app-name] -
Install Flask and Cloudant python modules. You will need pip if it is not already installed. These modules are already in your requirements.txt
$ pip install flask$ pip install cloudant -
Setup your local environment
$ cf env [app_name]Copy the VCAP_SERVICES block and stick it into a file named .env.vcap_services.json.
.env.vcap_services.json
  {
   "VCAP_SERVICES": {
    "cloudantNoSQLDB": [
     {
      "credentials": {
       "host": "xxxx-bluemix.cloudant.com",
       "password": "xxxx",
       "port": 443,
       "url": "https://xxxx-bluemix:xxxx@xxxx-bluemix.cloudant.com",
        "username": "xxxx-bluemix"
      },
      "label": "cloudantNoSQLDB",
      "name": "[app_name]-cloudantNoSQLDB",
      "plan": "Shared",
      "tags": [
        "data_management",
        "ibm_created",
        "ibm_dedicated_public"
      ]
     }
    ]
   }
  }
-
Run your server locally
$ python server.py
Create the CRUD REST API
Now we have a pretty basic Flask server. Run this locally and hit http://localhost:8000 to make sure it works.
import os
import cloudant
from flask import Flask, jsonify
import json

# Read port selected by the cloud for our application
PORT = int(os.getenv('VCAP_APP_PORT', 8000))
# Change current directory to avoid exposure of control files
os.chdir('static')

app = Flask(__name__)

@app.route('/')
def hello_world():
    return 'Hello World!'

if __name__ == '__main__':
  print("Start serving at port %i" % PORT)
  app.run('', PORT)
To implement the CRUD operations (create, read, update, delete), we will need to connect to our Cloudant db. Add the below code and you will be able to connect and create the db.
app = Flask(__name__)

if 'VCAP_SERVICES' in os.environ:
    cloudantInfo = json.loads(os.environ['VCAP_SERVICES'])['cloudantNoSQLDB'][0]
#we are local
else:
    with open('.env.vcap_services.json') as configFile:
        cloudantInfo = json.load(configFile)['VCAP_SERVICES']['cloudantNoSQLDB'][0]

username = cloudantInfo["credentials"]["username"]
password = cloudantInfo["credentials"]["password"]

account = cloudant.Account(username)
login = account.login(username, password)
assert login.status_code == 200

# create the database object
db = account.database('calls')

databases = json.loads(account.all_dbs().content)
if 'calls' not in databases:
    # now, create the database on the server
    response = db.put()
    print response.json()
Delete the boring HelloWorld code, and put this more exciting GET call in its place
@app.route('/api/v1/calls', methods=['GET'])
def getCalls():
response = db.all_docs().get(params={'include_docs': True})
if response.status_code != 200:
abort(response.status_code)
rows = json.loads(response.content)['rows']
docs = map(lambda row: row['doc'], rows)
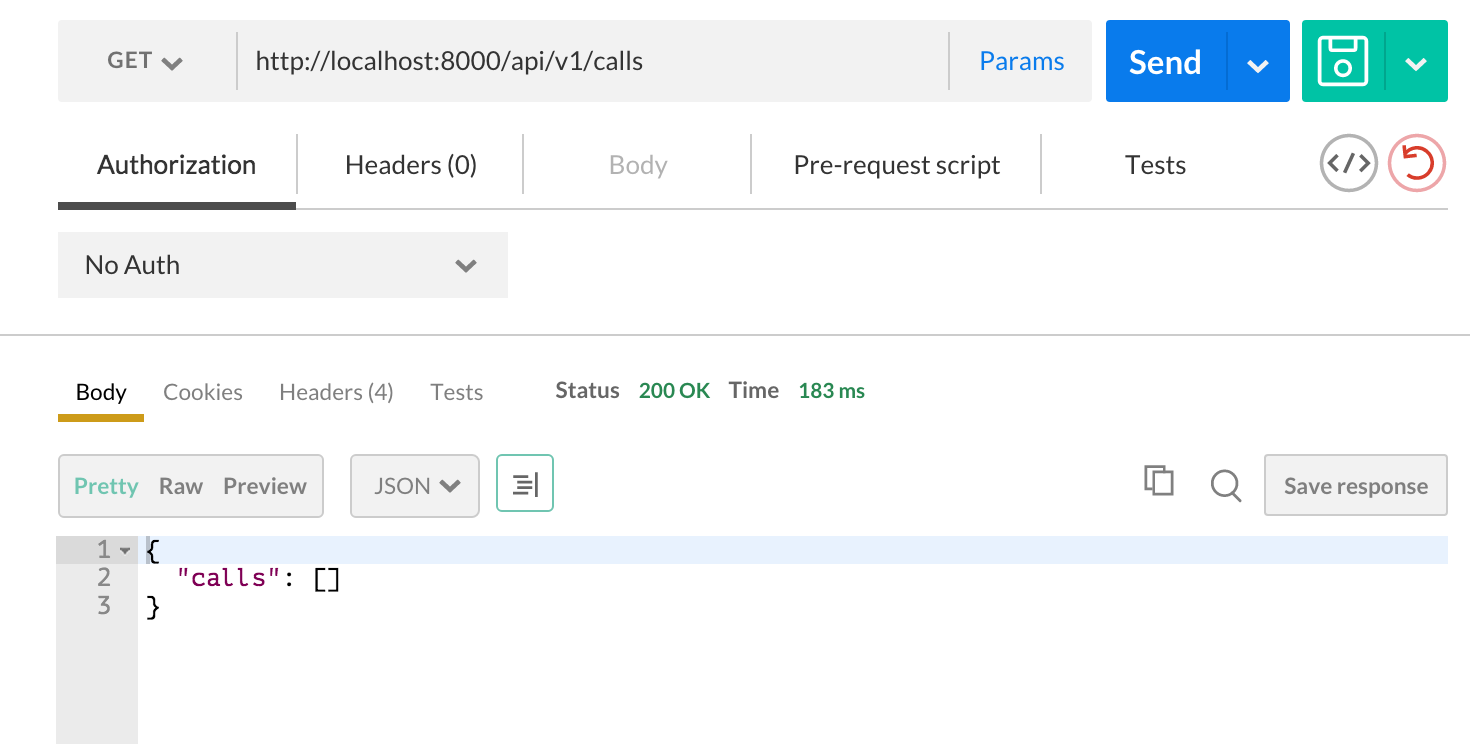
return jsonify({'calls': docs}), response.status_codeNote the weird @app.route above your function. This is a route decorator and is used to let Python know that this function should be called for the given url.
Run the server and navigate to http://localhost:8000/api/v1/calls. Ok, pretty cool that you can pull data from the server, but its not very interesting yet.
Using your browser is fine for GET calls, but we need something more powerful to test out the rest of our api. Postman is an awesome tool for this. Add the tool to Chrome and lets use it for our request.
Click the down arrow next to the floppy disk icon so that you can save this request to a collection (name the collection whatever you want).
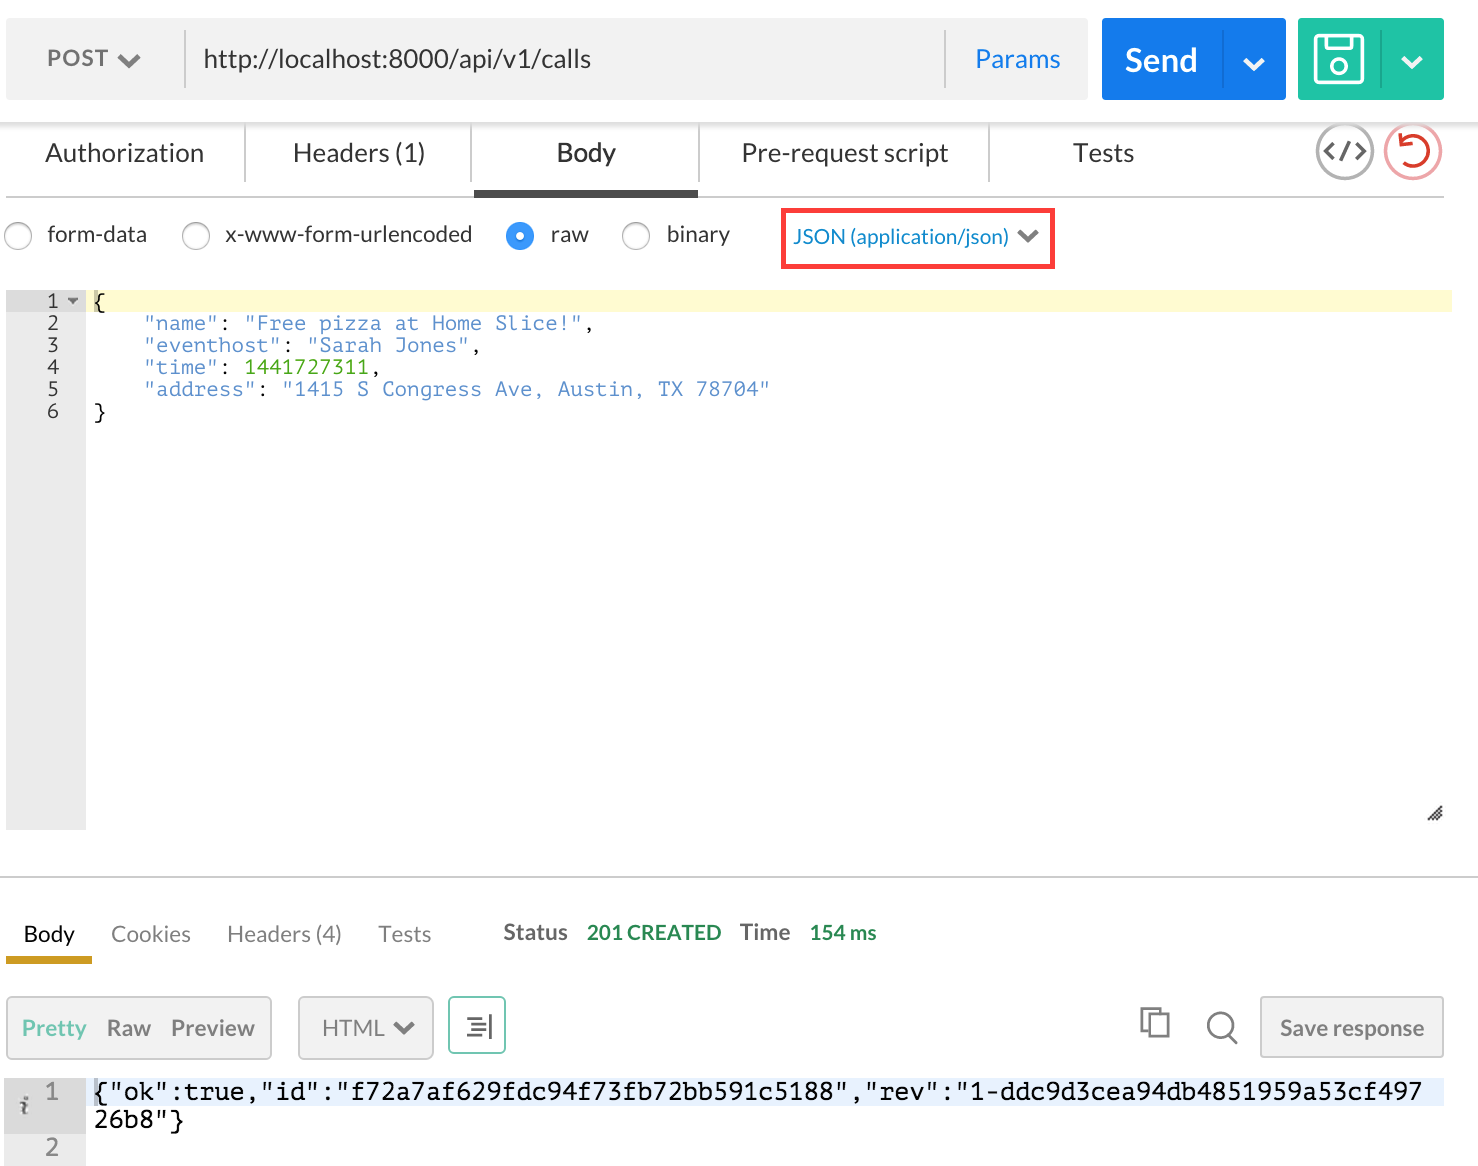
Create the POST endpoint so that we can add data:
@app.route('/api/v1/calls', methods=['POST'])
def createCall():
    if not request.json:
        abort(400)

    call = {
        'name': request.json['name'],
        'eventhost': request.json['eventhost'],
        'time': request.json['time'],
        'address': request.json['address'],
    }

    response = db.document('', params=call).post()

    return make_response(response.content, response.status_code, {'Content-Type': 'application/json'})
Change your Postman request to POST, and update the request like below. Make sure to save this request as well. You can run this POST a few times, and then try your GET request again. Look at that, it works.
We do not always, or rarely even, want to GET every document in our database. Lets make a GET call that will only return the specified doc by id.
@app.route('/api/v1/calls/<string:id>', methods=['GET'])
def getCall(id):
    response = db.get(id)

    if response.status_code != 200:
        abort(response.status_code)

    return make_response(response.content, response.status_code, {'Content-Type': 'application/json'})
At this point you should have the gist of how to create a REST api. Lets go ahead and knock out the last two CRUD endpoints; update and delete
@app.route('/api/v1/calls/<string:id>', methods=['PUT'])
def updateCall(id):
    if not request.json:
        abort(400)

    document = db.document(id)

    response = document.merge(request.json)

return '', response.status_code@app.route('/api/v1/calls/<string:id>', methods=['DELETE'])
def deleteCall(id):
response = db.get(id)
if response.status_code != 200:
abort(response.status_code)
doc = json.loads(response.content)
response = db.delete(id, params={'rev': doc['_rev']})
return '', response.status_code-
Push your awesome server up to Bluemix
cf push [app_name]Now test your REST calls against your Bluemix Python server